Monday, 21 May 2018

May 2018 FREE Card Making Tutorial


Since I attended the Stampin’ Up! Onstage convention in April, I’ve had my hands on the new Annual Catalogue which means I knew all about retiring products and colours.

 
With that in mind, I set about focusing on some of those items that I’ve loved, just one last time before they disappear into the crafting ether at the end of this month (or earlier if they all get snapped up from the retiring list).


This card uses the following items that are retiring –


Tempting Turquoise Cardstock and Ink

Tutti-Frutti Designer Series paper

Glitter Enamel Dots

 
How to make this card –

·       Create an A6 card base by folding half an A4 sheet of  Tempting Turquoise cardstock in half

·       Adhere a 10x14.4 cm whisper white mat to the inside to create a place to write

·       Trim a piece of Tutti-Frutti Designer Series paper to 10x 14.9cm and adhere to the card base with an equal border on each side

·       Trim a piece of Whisper White cardstock to 8x14.9cm

·       Using the sketchy bubble stamp from the Bubble Over stamp set, create a background for your card using Tempting Turquoise and Lemon Lime Twist Inks

·       Using Tempting Turquoise, add your sentiment to the card towards the top

·       Adhere to the card

·       Using the Bottles and Bubbles framelet dies cut out the following –

2 straws from Whisper White

2 bottle caps from Whisper White

1 large bottle from Tempting Turquoise

1 large label from Tempting Turquoise

1 large bottle from Lemon Lime Twist

1 large label from Lemon Lime Twist

        2 large bottles from Vellum

 
·       Stamp the star bottle top stamp onto the Whisper White bottle tops using Tempting Turquoise and Lemon Lime Twist Inks

·       To assemble the bottles, firstly adhere the labels to the Vellum, then adhere the Vellum to the cardstock bottles, using the label to hide your adhesive. I chose to mix up the colours. Adhere your bottle cap to the label then a straw to the back.

·       Stick each bottles to the card using Stampin Dimensionals

·       Add Glitter Enamel shapes and Glitter and Clear Epoxy shapes as required.

All the products used are available to purchase in my online store or can be ordered through me.

 Hope you all have a wonderful day,

Karen


"If you can be anything, be kind"


Friday, 11 May 2018

Last Chance Discounts

Just a very quick post from me to let you know that there have been some discounts applied to the last chance list in my online shop. Up to 50% off selected items.


Publication
Page
Item ID
Description
Retail Price
Discount Percent
Discounted Price
2017–2018 AC
195
142001
6" x 17" (15.2 x 43.2 cm) Gusseted Cellophane Bags
6
50
3
2017–2018 AC
208
141843
Holly Berry Builder Punch
16
50
8
2018 OCC
29
145657
Itty Bitty Fruit Punch Pack
21
50
10.5
2018 OCC
37
145601
Myths & Magic Glimmer Paper 6" x 6" (15.2 x 15.2 cm)
13.5
50
6.75
2018 OCC
13
145643
Sweet Soirée Decorative Masks
4.25
40
2.55
2017–2018 AC
196
141680
Brights Enamel Shapes
8.25
25
6.19
2017–2018 AC
207
141846
Bell Punch
16
25
12
2017–2018 AC
213
143658
Birthday Friends Framelits Dies
28
25
21
2017–2018 AC
213
143703
Celebration Thinlits Dies
27
25
20.25
2018 OCC
6
145658
Picnic Basket Builder Framelits Dies
27
25
20.25
2017–2018 AC
160
142485
Alles Palette (Clear; German)
16
20
12.8
2017–2018 AC
196
141679
Subtles Enamel Shapes
8.25
20
6.6
2017–2018 AC
186
116203
Pink Pirouette A4 Cardstock
7.25
15
6.16
2017–2018 AC
186
131292
Soft Sky A4 Cardstock
7.25
15
6.16

Wednesday, 25 April 2018

My Creative Process


At the start of February, myself and 2 other Stampin’ Up! Demo’s ran a crafty event over a weekend for 42 ladies called Let’s Get Creative, and the one question I was asked more than any other was “How do you come up with ideas?”


So today I’m going to attempt to answer that question for you in the hope that it may give some of you a helping hand if you are ever stuck. This is just my way of doing things. There is no right or wrong in the creative process. You need to find what works for you.


1.  When I get a new stamp set / stamp and die set / stamp and punch set, the first thing I do is take a piece of Whisper White cardstock, a random ink pad (usually a Bright or Regal colour) and I stamp every image in that stamp set. I than take some coloured cardstock and I punch / die cut all of the coordinating shapes. Then I know exactly what I have to play with. Sometimes by just looking at the packaging, it’s not always obvious what you have in a set so I would always recommend stamping the lot first.


2.  Next I’ll do a little research, then I’ll plan, then I’ll make. My research consists of my Stampin’ Up! catalogues, Pinterest, YouTube or photos I may have saved on my phone from things that have caught my eye as I’ve been browsing online.  My research will also involve thinking about the recipient of my project, or the event that I am making my project for.


3.  My planning happens in one of 2 ways. I either gather supplies on my craft table because I have an idea in my head, or I sit down with a notebook and pencil and jot down as many things I can think of to do with that set.


4.  My making often starts with a direct CASE (copy and selectively edit / copy and share everything) of something I’ve seen that I liked. Then I might change up the colour. Then I might change up the layout. And before you know it, I’ve created something unique to me.


5.  Sometimes I start with a technique in mind. I have always kept a notebook of techniques and as I learn new ones, I add them to my list. I especially like to include techniques in my card classes so that everyone goes away with something new that they can try at home.


6.  Sometimes I start with a colour combination in mind. I was recently watching Frozen with my Grandaughter and jotted down the Stampin’ Up! version of the costume colours as I loved them and I wanted to create something with them.


I have to admit, I’m finding explaining this harder than I thought I would. I guess a lot of my creativity just happens and flows out of my head and onto the paper because I have been doing it for a number of years. But if I try and take myself back to when I first started, I think much of what I did was heavily based on the work of others. I would look and try to work out how they created something then I would try and copy with the materials that I had available to me. So it might end up a different theme or different colours, but that is what makes it your own.


Sometimes it’s good to walk away from something for a while if you’re not quite happy with it. Or take a photo of it and look at it from an alternative perspective.


And finally, never be afraid to throw it in the bin if it just isn’t working out how you’d like. It’s not worth losing any sleep over. It just a piece of cardstock and you can start again and you’ll probably love it.


Thursday, 12 April 2018

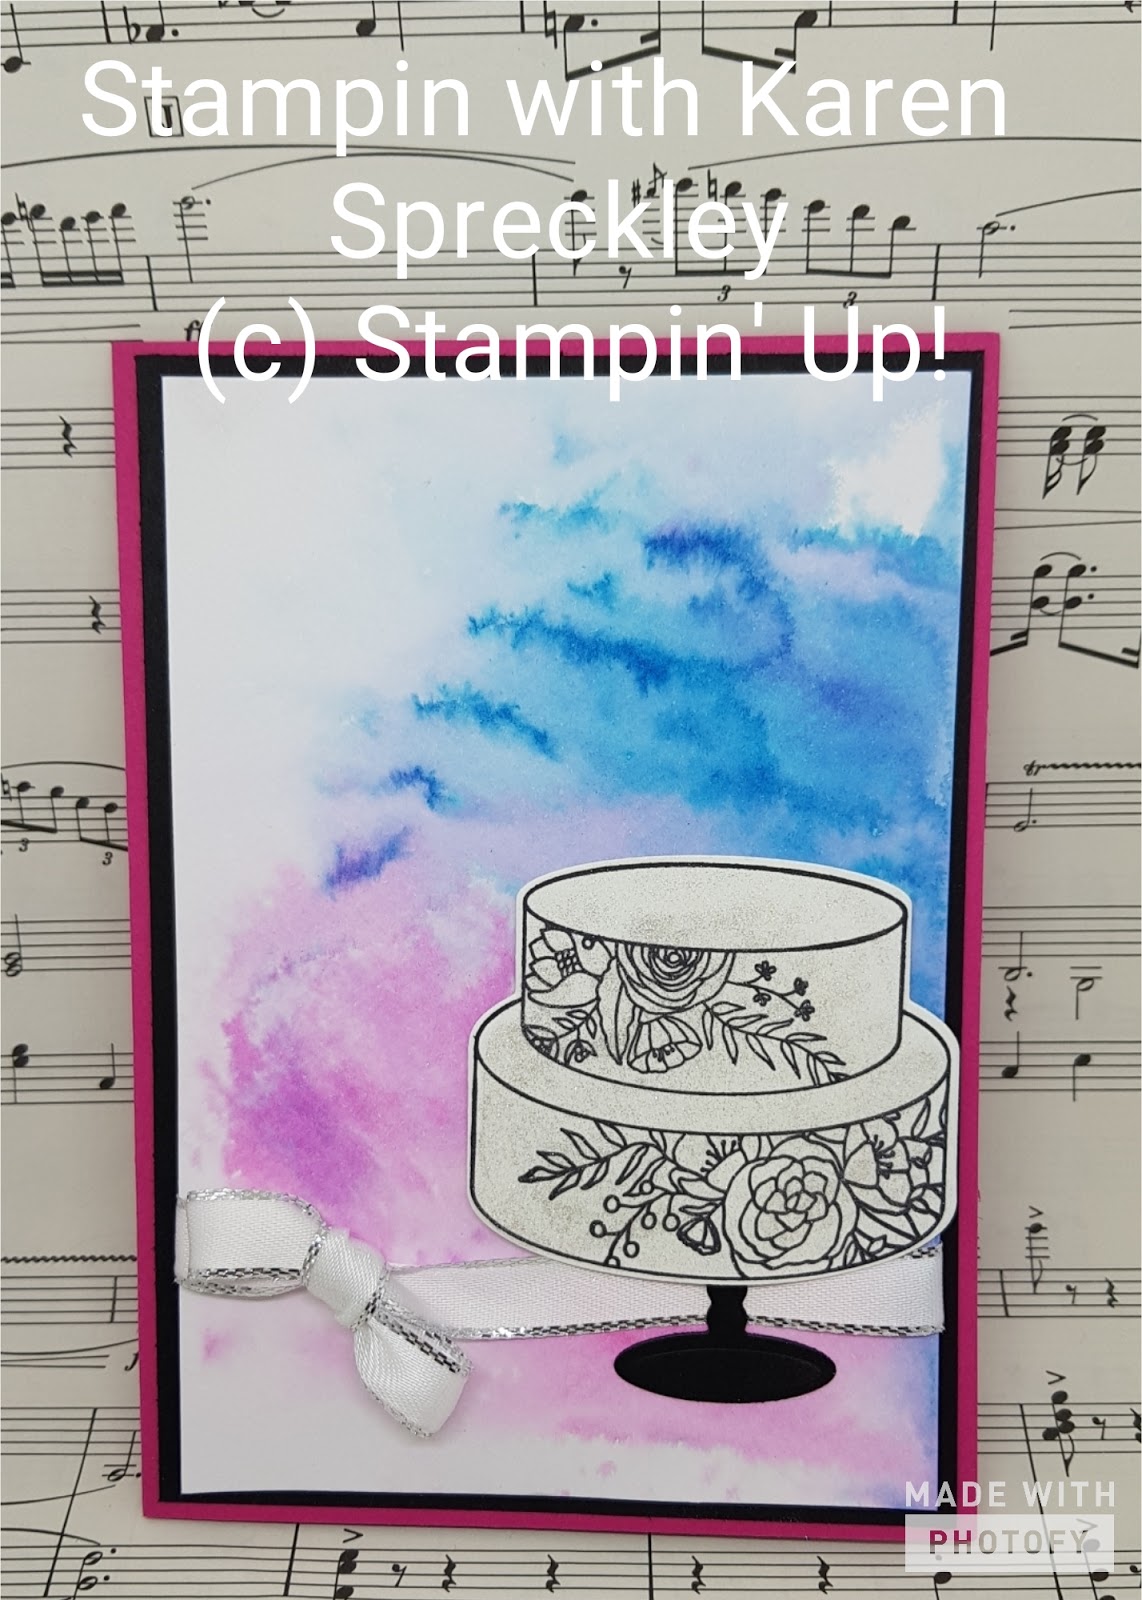
April 2018 FREE Card Making Tutorial


Hello everyone.


Today I’m going to share a watercolour smoosh technique.....that is an actual bona fide crafting term.....honest!


·       Create a Melon Mambo A2 card base by cutting a piece of A4 cardstock in half and folding that in half

·       Cut a mat of Basic Black cardstock that measures 10cm x 14.4cm and adhere that to the Melon Mambo card base

·       Cut a layer of Watercolour Card that is 9.5cm x 13.8 cm

·       Spritz the Watercolour Card with water

·       On a slick surface (I used a piece of laminated white card) press down some Melon Mambo ink and some Pacific Point ink directly from the ink pad and them spritz with water until the ink puddles

·       Use a piece of Window Sheet to pick up some of that wet ink and transfer it to the damp Watercolour card. Repeat until you are happy with the result, then set it aside to dry

·       Stamp the decorative cake from the Sweet Soiree stamp set in Archival Black ink onto to Whisper White card

·       Die cut the stamped cake and a cake stand on the Bigshot using the Cake framelets.

·       Once the watercolour piece is dry, wrap Silver Edged ribbon around it and create a bow or a knot for interest, then adhere this panel to the black mat on the card base.

·       Adhere the cake and the stand to the watercolour piece using Stampin Dimensionals

·       Add a sentiment to the inside if you wish.


All the products used are available to purchase in my online store or can be ordered through me.

Hope you all have a wonderful day,

Karen

"If you can be anything, be kind"